
What do a startup CEO, a lawyer, and a freelance photographer all have in common? They all need a website. In today’s world, that’s both easier and more complicated than ever before. The emergence of site builders makes professional websites accessible to non-designers and non-techies alike. But just because it’s easy doesn’t mean it’s the right way to go. We have a ton of experience in this field—we know what to do and what to avoid. Based on our experiences, Hostinger with WordPress is the best way to get started. Keep reading to learn how to do just that.
Why Creating a Website is Worth It
Even if your business is brand new, creating a website is a worthwhile investment. It gives you access to a global audience, establishes credibility, eliminates geographical barriers to expand your customer base, and gives your business a permanent online home.
Sure, you can use social media to reach out to more people.
But you’re still at the mercy of algorithms and the ever-changing rules that don’t do much to give you the stable base you need to bolster your business’s growth.
And let’s not forget the thousands of other businesses, influencers, and profiles you’re competing with for attention on social media.
What happens when Instagram changes its algorithm again? Or when your loyal fans can’t interact with you because they can’t see your posts on Facebook?
If social media’s the only way you stay in touch with your audience, you’re one algorithm change away from losing touch with your fans.
But when you create a website, it’s yours. You don’t have to worry about changing algorithms or checking to see if your devoted readers can still see your content. You get the control and flexibility you need while establishing your business as a trustworthy brand.
Your website is a valuable piece of online real estate that also acts as your biggest salesperson. You decide what it looks like and how it functions while it gives you constant contact with your customers and fans.
The Investment Needed to Create a Website
While you can build a website for free, we don’t recommend it.
Here are some reasons why?
For one, you probably won’t be satisfied with the finished product free providers always keep the best features for paying customers. And two, you can’t use your own domain name, you get minimal storage and bandwidth, and are stuck with ads on your site.
Really that’s three reasons, but we’re in a giving mood.
There is good news. And that’s you don’t have to spend a lot to avoid those limitations.
As long as you’ve got a few dollars to spare a month, you can get everything you need, including reliable (and fast) web hosting plus a domain name.
Our favorite host for brand new websites is Hostinger. Its entry-level plans start at just $1.99 per month, giving you four whole years of hosting for less than $100.
You’ll need to purchase a domain name as well, which will cost you around $10 to $15 per year. WHOIS privacy for that domain name will run you an additional $10 per year.
However, you can snag a free domain name if you upgrade to Hostinger’s WordPress Starter package. It’s a bit more at $3.99 per month, but you get a free domain name, better performance, and a server optimized specifically for WordPress websites.
With an initial investment of around $150 to $250, you can score reliable hosting services and a domain name for four years.
With that said, you don’t have to commit to four years, that’s just the best way to get the best deal. Instead, you can opt for a one-year plan if you have less than $100 to invest today.
As for the time involved, you can have the initial concept of the website up and running in just a few hours. However, expect to spend at least three to five days designing your website, creating copy, and perfecting everything.
The exact duration depends on the complexity and how fast you master the platform, but it’s still a good estimate to have in mind.
Nine Steps to Create Your First Website
Without further ado, let’s take a look at how to make a website from scratch in mere minutes.
Step 1 — Select a Hostinger Plan
Hostinger is a leading web hosting service. It’s reliable, offers amazing feature-rich hosting plans, and more importantly, it’s dirt cheap.
Click on this link to go to Hostinger’s website.
When the webpage opens, click Start Now and select a plan from the options available.

We recommend opting for the WordPress Starter plan, which is in the middle-left column in the image above. You get all the user convenience and features you could want. Plus a free domain name.
Keep in mind that the rate you see is for a four-year plan.
After you click select, you can see rates for shorter commitments of one year, two years, or month-to-month pricing.
Step 2 — Go Through Hostinger’s Setup Wizard
Enter your personal information and billing information to finalize the purchase of your Hostinger web hosting plan.
Fill in all the fields carefully to avoid errors.
After you submit your payment information, Hostinger’s easy setup wizard takes the reins.
First you’ll answer a couple questions: who the site is for, what kind of site it will be, and your experience level with site building. These help Hostinger’s wizard tailor the setup process to you.

After that, select your preferred site platform. We recommend WordPress for most sites. If you’re going to sell products or services, Hostinger also offers a combination of WordPress and WooCommerce so you can just as easily setup a web store as a blog or business homepage.

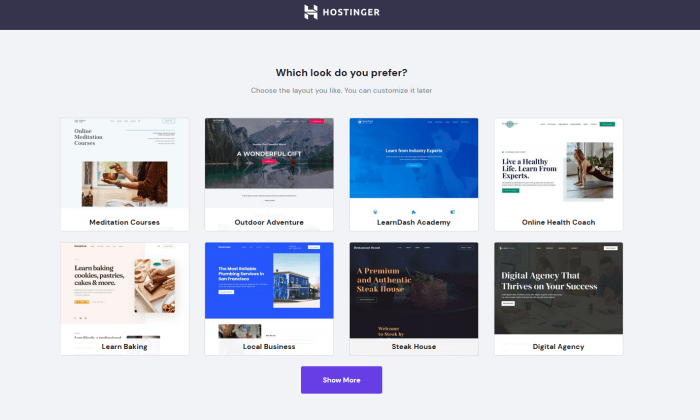
The next screen after that lets you pick a theme or template, if you’d like. You can also just start from scratch with a blank WordPress site.
Once you complete that step, you’re almost finished with the setup process! Next, we’ll secure that domain name for free from Hostinger.
Step 3 — Figure Out Your Domain Name
Your domain name is your website’s address. For example, ours is http://www.crazyegg.com.
It’s what your customers will type in their web browser to see your content. Precisely why it should be relevant, catchy, and reflect what you plan to do with your business as closely as possible.
You may encounter some challenges here.
First and foremost, your prospective domain has to be available. If you use common words and keywords, it’s likely the domain will be taken by another business.
So it’s best to opt for unique domain names.
Hostinger gives you two options after you select your site platform and template. You can secure a new domain through Hostinger or connect one you already own to your site.

If you signed up for the WordPress Starter plan, the cost of the domain is covered! Just select the left-hand option and search for an available domain in the field that appears below it.
After you find your domain, make sure to opt for WHOIS privacy for an extra $10 per year. It means you pay a little more, yes, but it will keep your private information (like your name and address) from being publicly searchable. That’s well worth it.
Once that’s done, Hostinger will finish the setup process and you’re all set!
Step 4 — Set Up Your WordPress Website
Fortunately, Hostinger installs WordPress for you. So there’s nothing you need to do to have your website ready to design and fill with content.
Once setup is complete, you’ll see this sceen:

Click Manage WordPress and you’ll be taken to that section of your Hostinger dashboard.
There, you can see the version of WordPress that Hostinger has installed for you.

You don’t need to do a thing at this point. But, if you ever need to do a clean installation of WordPress again (or for another site on your Hostinger plan), you can find that option right at the bottom of the same section of your dashboard.

To start working on your WordPress site, just scroll a little bit above where you see the WordPress version and click Edit Website. That will take you into WordPress itself to make changes to your website.
This is where things will get more detailed, so be prepared! Take a ten-minute break, hydrate, and focus.
Go through every tab and section of WordPress’s menu bar carefully to familiarize yourself with the WordPress UX. Most of them are self-explanatory, like Posts, Media, Pages, Comments, and Settings.
Our focus here is to fine-tune basic settings to improve your experience later. Here are three things to do right away to get started:
1. Finalize Your Website Title and Tagline
Click on the Settings tab on the WordPress black menu bar on the left of the screen, followed by General. Type in your Site Title and Tagline in the respective fields.
Adding a tagline is optional. If you don’t have a tagline for your website, you can leave it blank. You can also change or updates these later.
2. Set Your Website Permalinks
For those of you who don’t know, permalinks define how the individual web page addresses or the URLs of your website will look like.
You want to choose the most optimized URL structure for SEO purposes—not to mention, it also looks better aesthetically.
Think about it: which one do you prefer, yourdomainname.com/about or yourdomainname.com/2018/aboutp?
To do this, go to Settings, followed by Permalinks from the main WordPress sidebar. You see a list of options on your screen. Check the Post name field.

3. Make Your WordPress Website Public
You have to make your website public if you want Google to find an index for your website.
To do this, head over to Settings and click on Reading. Uncheck the Discourage search engines from indexing this site option under the Search Engine Visibility field (or ensure it is not checked).
Step 5 — Select and Install a WordPress Theme
WordPress themes decide the look of your website. And while you can change themes, you do want to put some thought into selecting a theme for your website. Once your site is fully up and running, it can be much more difficult to change themes and ensure all content is copied over correctly.
Right now, you have a default theme. But with just a few clicks, you can give your site a unique look and feel.
Open the official WordPress.org directory.

You’ll find tons of free and premium themes to browse. What’s more, you can check out third-party websites like ThemeIsle and aThemes too if you want even more options.
If the theme you like is available in the official WordPress.org directory, you can install it directly by following the instructions below.
On the main WordPress dashboard, go to Appearance, followed by Theme. Select Add New at the top.

If you know the name of the theme you want to install, enter the name (we chose the “Hestia” theme) in the search bar, and click on Install under the desired theme.

After the installation process is complete, click on Activate to enable it fully on your website. This button will automatically pop up in place of the Install button after installation is done.
The process will be slightly different if you want to download and install a premium theme.
Follow the instructions to download your theme. Generally, the files are downloaded in a .zip file format. Save it to your desktop.
Return to your WordPress dashboard, and click on Appearance, and then Themes. Select Upload on the Themes page.

Click Upload Theme. This will open a file input selection dropdown. Click Browse… and choose the .zip file you just downloaded. Click Install Now.

Step 6 — Choose and Install Appropriate WordPress Plugins
If themes make your website look better, plugins make it work better.
At the same time, you don’t want to go overboard with downloading plugins. Too many will only slow down your website—something you want to avoid at all costs!
Consider your needs as you browse through plugins. You may want help with SEO or a contact form or social media sharing buttons–there are plugins for almost everything. And remember, you can always add more plugins later as you build your site.
Here’s how to download a plugin:
- Go to your WordPress dashboard.
- Click on Plugin, followed by Add New.
- Type the name of the plugin you want to install in the search bar.

- Click on Install, and once the installation is complete, Activate.
The plugin is now added to your WordPress site, and you will see it listed in your WordPress dashboard menu. Click on the plugin to view and change settings, add content, and more.
Step 7 — Create Pages for Your Website
This is where you create high-quality and excellent content for your website.
Pages are things like Homepage, an About page, a Contact page, or a Portfolio page. You can also consider adding a Blog page to your website to attract visitors and help with SEO.
In WordPress, you’ll see an item on the left-hand menu bar for Pages. Hover over that and click Add New on the submenu that pops up.
The entire canvas is yours to write and design however you’d like. Then, just click Publish when you’re done.
You can edit and revise pages whenever you want, as well as adding new pages at any time.
Step 8 — Improve Your Website’s Navigation
At this stage, you’ve checked off all the essential tasks.
The only thing left is adjusting your website’s navigation to make your content more digestible for visitors. Plus, it doesn’t hurt you to score brownie points with the SERPs too!
Here is how to adjust your menus and widgets.
1. Adjust the Menu
Your choice of theme will determine the number of options available to you concerning your menu settings.
To open the menu panel, click Appearance and then Menus on your WordPress dashboard sidebar.

On the left side are all the pages you can add to a menu, while the right side covers the menu structure and its settings. You can drag and drop the menu items to reorder them however you want.
Once you’re done, click on Save Menu to save the settings.
2. Adjust the Widgets
Widgets are a block of content you can place in different places around your website. To open the Widget page, go to Appearance on the main dashboard, and click on Widgets.
Here’s what it should look like:

To add a widget, you’ll have to grab it from the left-hand side and drag-and-drop it to your chosen area on the right. Again, you have free rein over how to design your website—just ensure you prioritize things from the customer‘s viewpoint for best results.
Your site is not live yet, so you can preview the site and see how everything looks, and continue to adjust the menus and widgets and change themes until you’re happy with the results.
The design and layout of your site are what takes the most time in this whole process.
Step 9 — Launch Your Website!
Hostinger takes care of installation of WordPress and getting everything ready for your site to go live. So, it’s ready to go whenever you’re done with tweaking the design and adding content.
Just make sure your domain is pointing to your new website properly. You can find that easily in the WordPress area of your Hostinger dashboard. Hostinger will let you know if you there are any issues. If you’re able to click on Edit Website, your domain is connected properly.
Now your website is live and ready for visitors!
Next Steps
The first thing you want to do is sit back and watch your hard work come to life. Looks amazing, right?
Next up is following best practices to boost your website traffic. One of the best ways to do this is by creating blog posts and other marketing assets and publishing them on your website.
This involves tons of steps: conducting keyword research, applying SEO best practices, monitoring progress, building an email list… the list goes on.
Think of it as a continuous process where you always aim to improve and scale higher. Here are two Crazy Egg posts to put you on the fast track to success:


